How to Prepare the Sample for a Notch Test?

Gaurav Malhotra
The Charpy Impact Test, commonly known as the Notch or V-notch test, done with the help of an impact testing machine is a widely utilized method for assessing the energy absorption capacity of notched samples under high-pressure conditions. This standardized test serves as a reliable measure to examine the ductile-brittle characteristics of materials. Industries favour the Charpy impact test due to its ease of conduct, providing quick and accurate insights into the ductility and strength of materials. However, it's important to note that comparisons with results from other tests may sometimes be challenging.
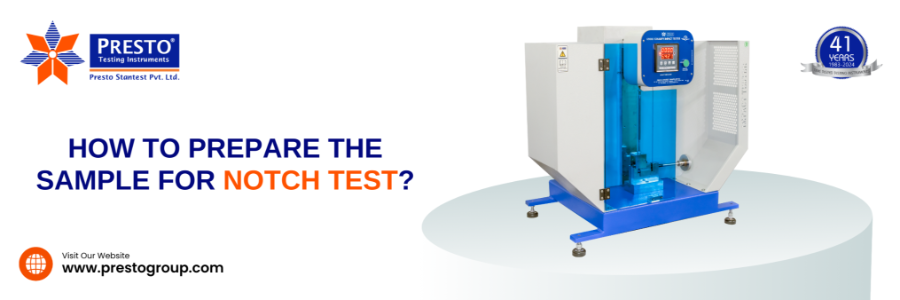
Presto izod impact tester has been designed as per industrial standards that include ASTM D – 256 -10 & ASTM D6110-10. This will help you ensure accuracy in testing results. In this blog, we will discuss brief information about how you can easily prepare the sample for conducting a notch test on the materials. So, let us get started!
All About Performing Notch Tests on Metals
The Notch test performed by impact testing machine is a renowned term which is used for the famed Charpy Impact Testing procedure. In this form of standardized testing method, the notched specimen is evaluated in terms of the amount of energy it consumes when under enormous pressure. In order to examine a sample's ductile-brittle behaviour, this energy or force is known to be a pathway.
To conduct the test by using impact resistance tester, firstly, a notch is prepared in the testing specimen according to the testing standards used for the impact test. Since multiple testing parameters can influence the test data, it is imperative to make sure that all test factors are applied accurately before starting the test. In terms of physical angle and dimensions, it is very important to verify the accuracy of the notch created. You can easily evaluate the toughness of plastic materials through izod impact resistance testing.
Now, let us discuss some common issues that may occur while conducting an izod impact resistance test on the materials with the help of impact resistance tester. So, let us get started!
Some Common Problems Occur while Performing Notch Tests on the Materials
It is common for quality heads to experience some common problems when conducting the impact resistance test with izod and Charpy testers. We have listed these problems below, along with ways to fix them.
Display error: OL
Cause: This will happen due to hammer will not be placed on accurate scale mode.
The solution is:
Press the call button.
The user will see 0000 on the upper display and the range of the selected scale on the lower display. Press PAR, and then the up and down arrow keys to select the appropriate scale.
You can easily go for the scale according to the strength of the sample to perform this test appropriately.
The Electromagnetic Pin is not working when the Manual Release Push Button is pressed.
Cause: The spring of the electromagnetic pin may be loose.
The solution is:
From the backside, adjust the spring of the Electromagnetic pin.
Incorrect Reading on Display.
Possible Cause: The appropriate scale corresponding to the sample strength is not selected.
Solution: Choose the appropriate scale, such as r1, r2, r3, or r4, based on the sample strength.
These are some of the things that you need to take care of while conducting the izod impact resistance test on the materials.
By conducting the Izod impact test on the materials, manufacturers can easily and accurately ensure the quality of metals or plastics before delivering them to the customers. You can read more on these problems that occur during impact resistance testing on the materials.
Now, let us discuss how you can easily prepare the testing sample for the izod impact resistance test.
How to Prepare the Testing Samples for the Izod Impact Resistance Test?
To prepare the testing sample for conducting an izod impact resistance test on the materials, you can follow the steps mentioned below:
Take a sample and mark the centre position. Open the screws to place the sample.
You can place the sample in the space provided in such a way that when the knife edge coincides with the marked position then you can tighten the screws.
Now adjust the sample using the micrometre so that it comes in contact with the cutter and assume this reading as zero preference.
Start the motor for movement of cutting tools by pressing the main red indicator switch.
Move the micrometre forward up to the required depth to make the notch on the sample.
For example, if you want to make a notch on a sample of 2.5 mm, rotate the micrometre 5 times.
On completion of the procedure, Switch OFF the Mains. Take the micrometre back to its initial position and unclamp the sample by opening the screws.
At the last step, you can remove the sample from its location and start performing izod impact resistance testing on the materials.
These are some easy-to-follow steps that you can follow while preparing the testing sample for the izod impact resistance test.
Once the sample is prepared, then you can easily place the sample on this testing machine. Now, let us discuss some easy steps to install this Presto Stantest Pvt Ltd izod impact tester.
How to Install an Impact Test Apparatus while Conducting a Notch Test on the Materials?
The izod impact testing is one of the essential quality control methods that will be performed on the materials to measure their impact resistance. Below we have listed the steps for installing the impact resistance test on the materials.
To correctly install the elements in this impact test apparatus, follow the steps outlined below:
Step 1: Unboxing
Open the wooden box with the upward side facing you.
Step 2: Placement
Position the machine on a sturdy concrete base, preferably on a rubber mat to minimize machine vibration.
Step 3: Leveling
Install the levelling legs into the designated holes located at the base of the Izod/Charpy tester. This ensures the izod impact testing is properly levelled for accurate testing. Levelling is crucial to maintain the stability and precision of the testing equipment during operation.
By following these steps, you can easily ensure accuracy in testing results. It will be easy for you to determine the impact toughness of materials. Presto Stantest Pvt. Ltd. offers the best izod impact tester price to the customers and helps them to ensure accurate test results. If you wish to take a free sample testing session for this testing equipment then you can contact us at +919210903903 or email us at info@prestogroup.com.
you may also like
- The Ultimate Guide to Lab Testing Equipment: Ensuring Quality with Precision Instruments
- GSM Calculator Guide: How to Measure Fabric, Paper & Plastic Weight
- What Is a Gloss Meter? Working Principle, Uses & Benefits Explained
- Applications of Tensile Testers in Plastic, Metal & Rubber Industries
- How UV Chambers Help Manufacturers Beat Sunlight and Weather Challenges
Recent News
- Paper & Packaging Testing Instruments
- Paint, Plating & Coating Testing Instruments
- Plastic & Polymer Testing Instruments
- Environmental Testing Chambers
- PET & Preform Testing Instruments
- Color Measuring Testing Instruments
- View Entire Range Instruments

Catalogue 2023
Get information about new product launches, research, innovation and endeavors at Presto.
download Free Copy
Get a Quote

