Incorrect Electrocoat Film thickness harms Market Reputation

Incorrect Electrocoat Film thickness can be a huge problem for a coating industry. In case, the coated film build on any product is less than the required value, appearance and durability both could be greatly affected. Factors such as the position of the color, smoothness, durability, adhesion, and corrosion are directly dependent on the coating thickness of the product. Hence quality and validity reduce along with the coating thickness.
Coating thickness is an important factor to keep in mind for ensuring quality production.
There are two basic methods for measurement:
1) Destructive Testing
2) Non-Destructive Testing
The Destructive test demands to cut off the coated part, and then by optical or mechanical methods measuring the coating thickness. But this type of test is not practical for the coating Industries.
Hence, the demand for the non-destructive test is growing for accurate measurement of coating thickness. This method does not involve any damage to the coating or substrate and is easy to use anywhere.
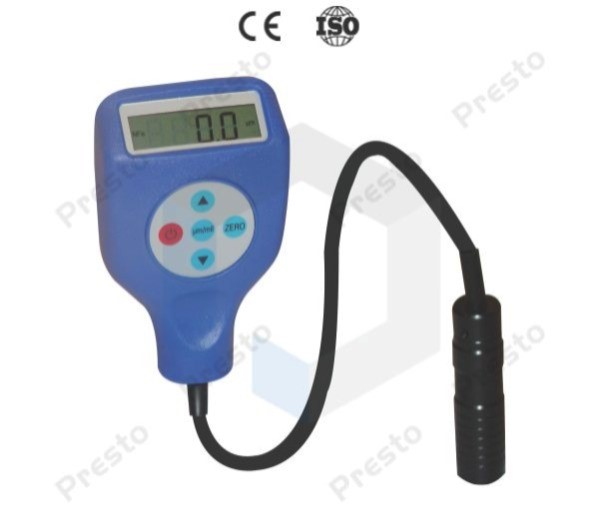
Experience a new level non-destructive technique with ‘Presto Coating Thickness Gauge’. It utilizes magnetic or eddy-current thickness measurement methods.
Three widely trusted Models are available:
It is based on eddy current measurement method.
It is constituted with flexible lead measuring probes set of 5 calibration foils and zero disks.
Fit for single and multiple point calibration.
Thickness range: 0-1250 mm.
Accuracy: ±2.5 mm
It is based on eddy current measurement method.
It is used for non-ferrous models having non-conductive coating (paint, enamel, rubber plastic etc.) or for non-magnetic metal (aluminum, copper, zinc, tin, etc.)
It is constituted with flexible lead measuring probes set of 5 calibration foils and zero disks.
Thickness range: 0-1250 mm.
Accuracy: ±2.5 mm
Auto-Hold reading on the display is present

Maintain the Market Reputation by ensuring high quality coating thickness with Presto Coating Thickness Gauge.
you may also like
- The Ultimate Guide to Lab Testing Equipment: Ensuring Quality with Precision Instruments
- GSM Calculator Guide: How to Measure Fabric, Paper & Plastic Weight
- What Is a Gloss Meter? Working Principle, Uses & Benefits Explained
- Applications of Tensile Testers in Plastic, Metal & Rubber Industries
- How UV Chambers Help Manufacturers Beat Sunlight and Weather Challenges
Recent News
- Paper & Packaging Testing Instruments
- Paint, Plating & Coating Testing Instruments
- Plastic & Polymer Testing Instruments
- Environmental Testing Chambers
- PET & Preform Testing Instruments
- Color Measuring Testing Instruments
- View Entire Range Instruments

Catalogue 2023
Get information about new product launches, research, innovation and endeavors at Presto.
download Free Copy
Get a Quote


